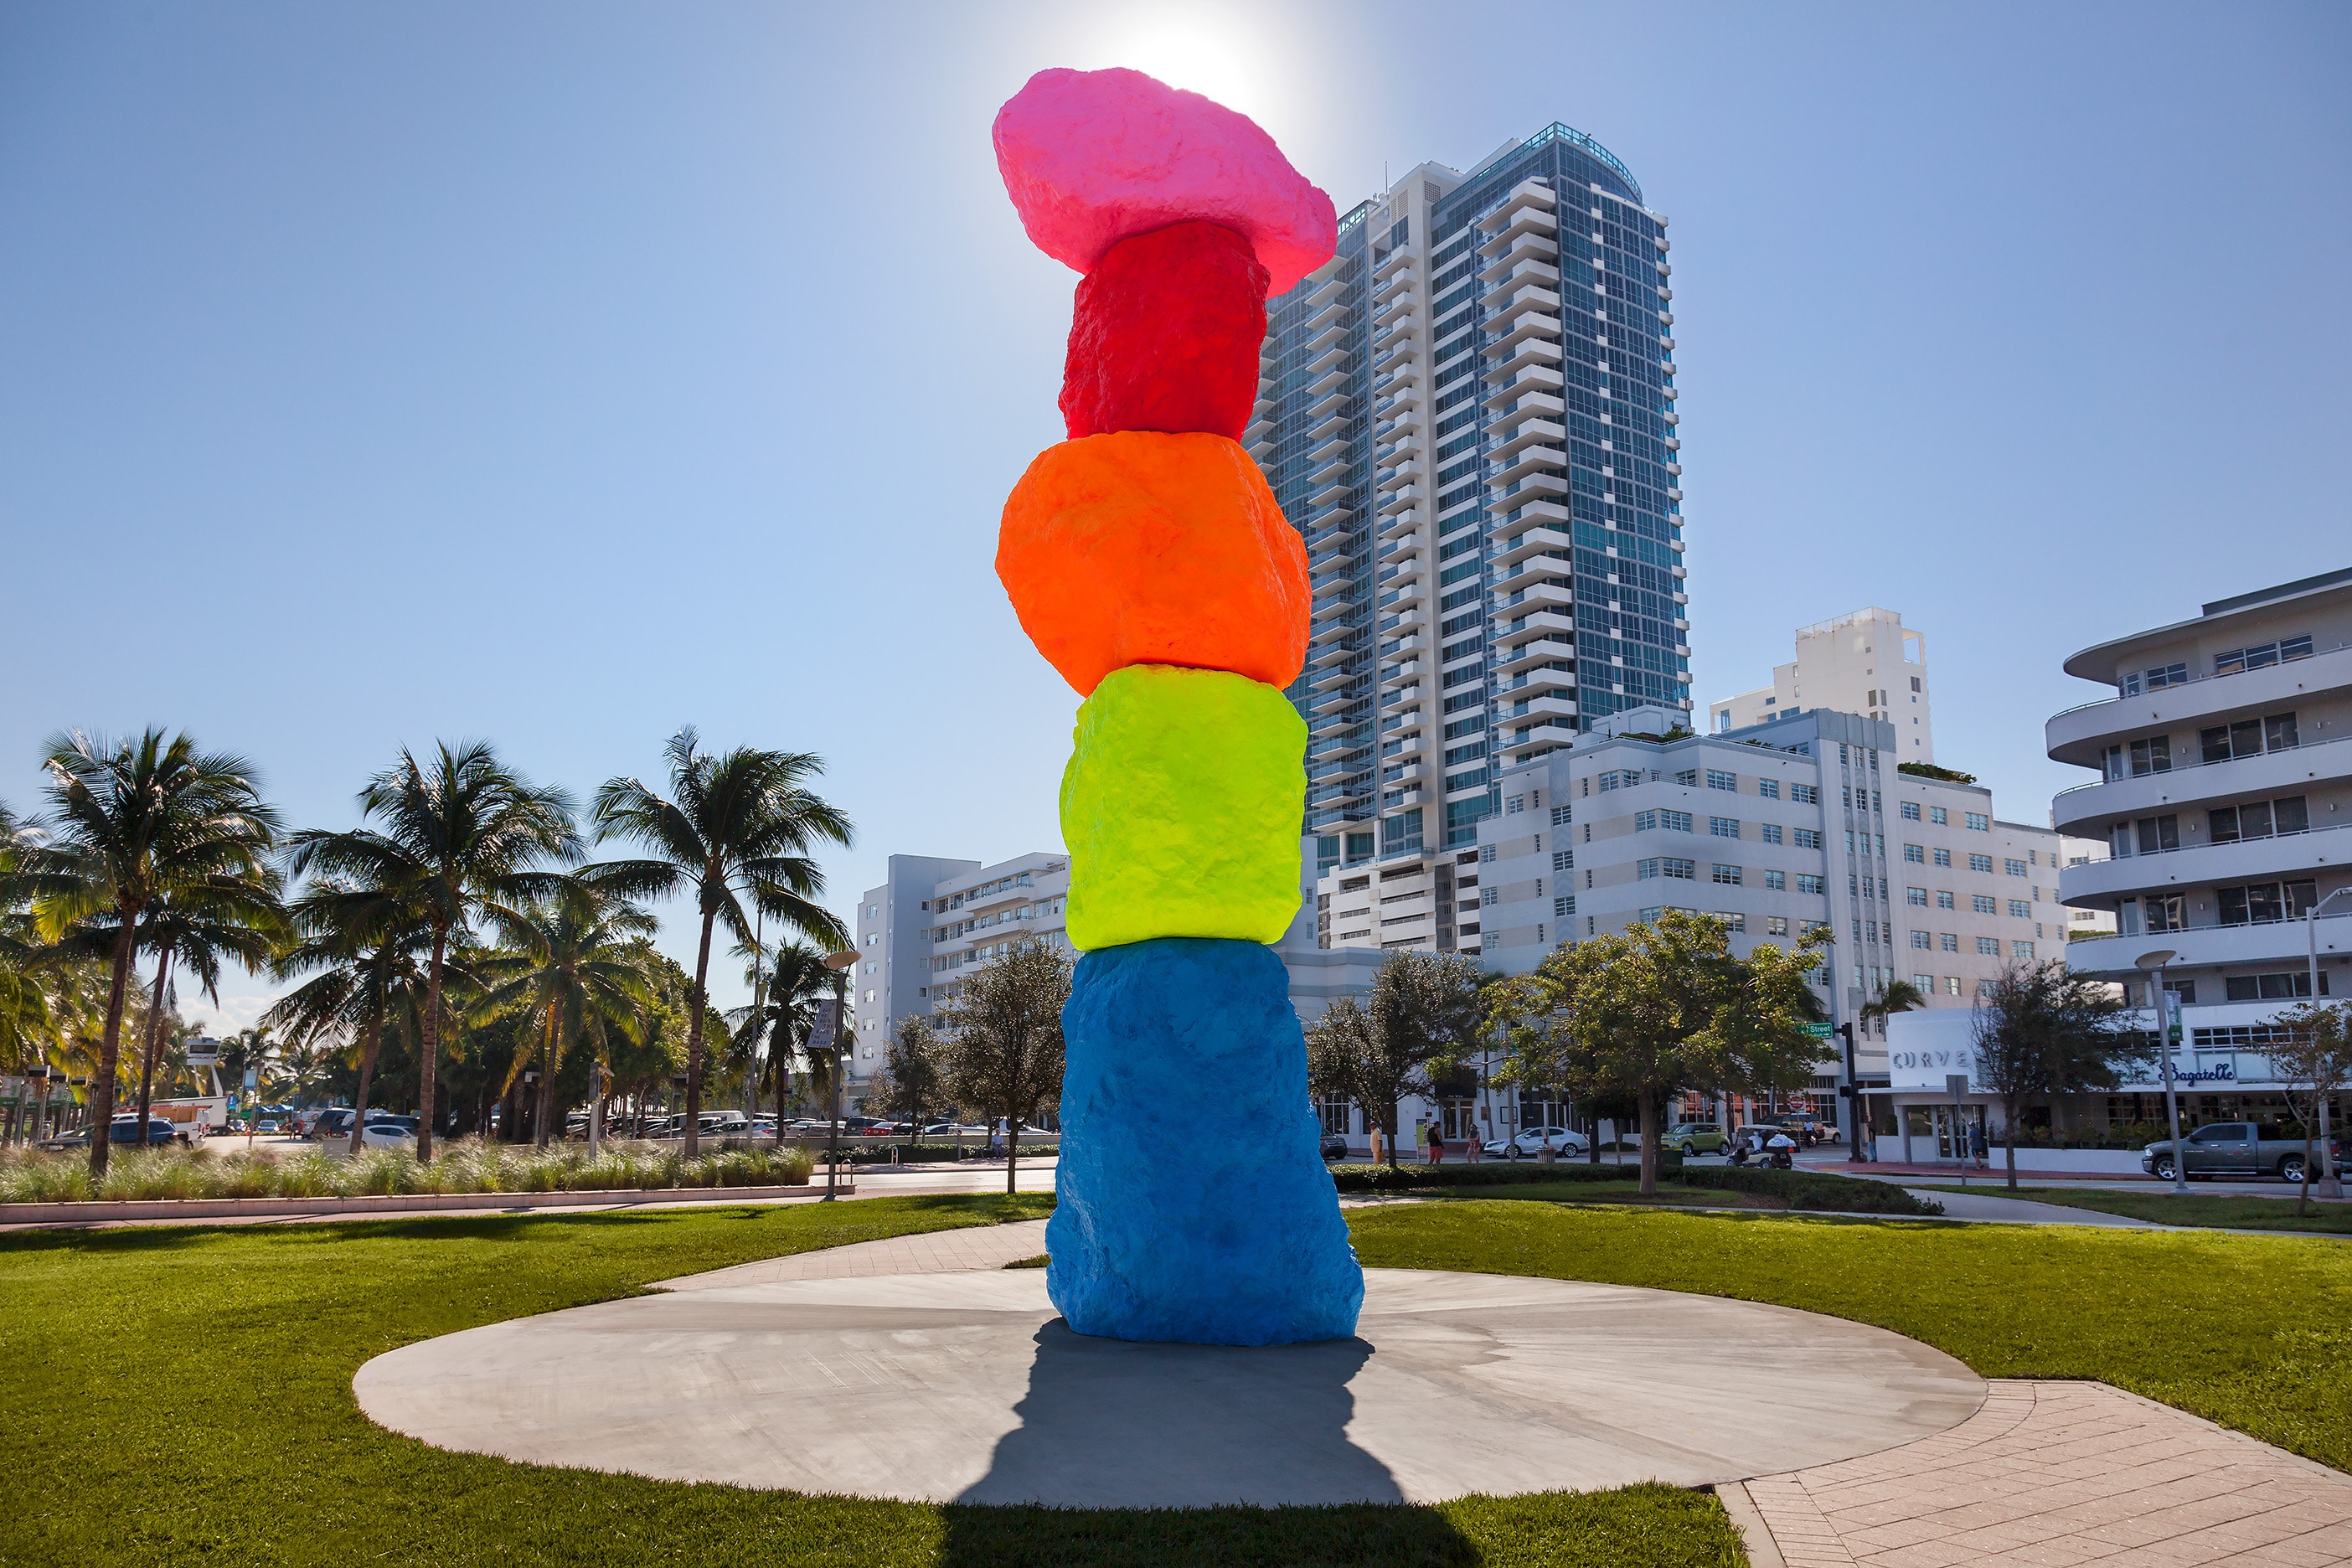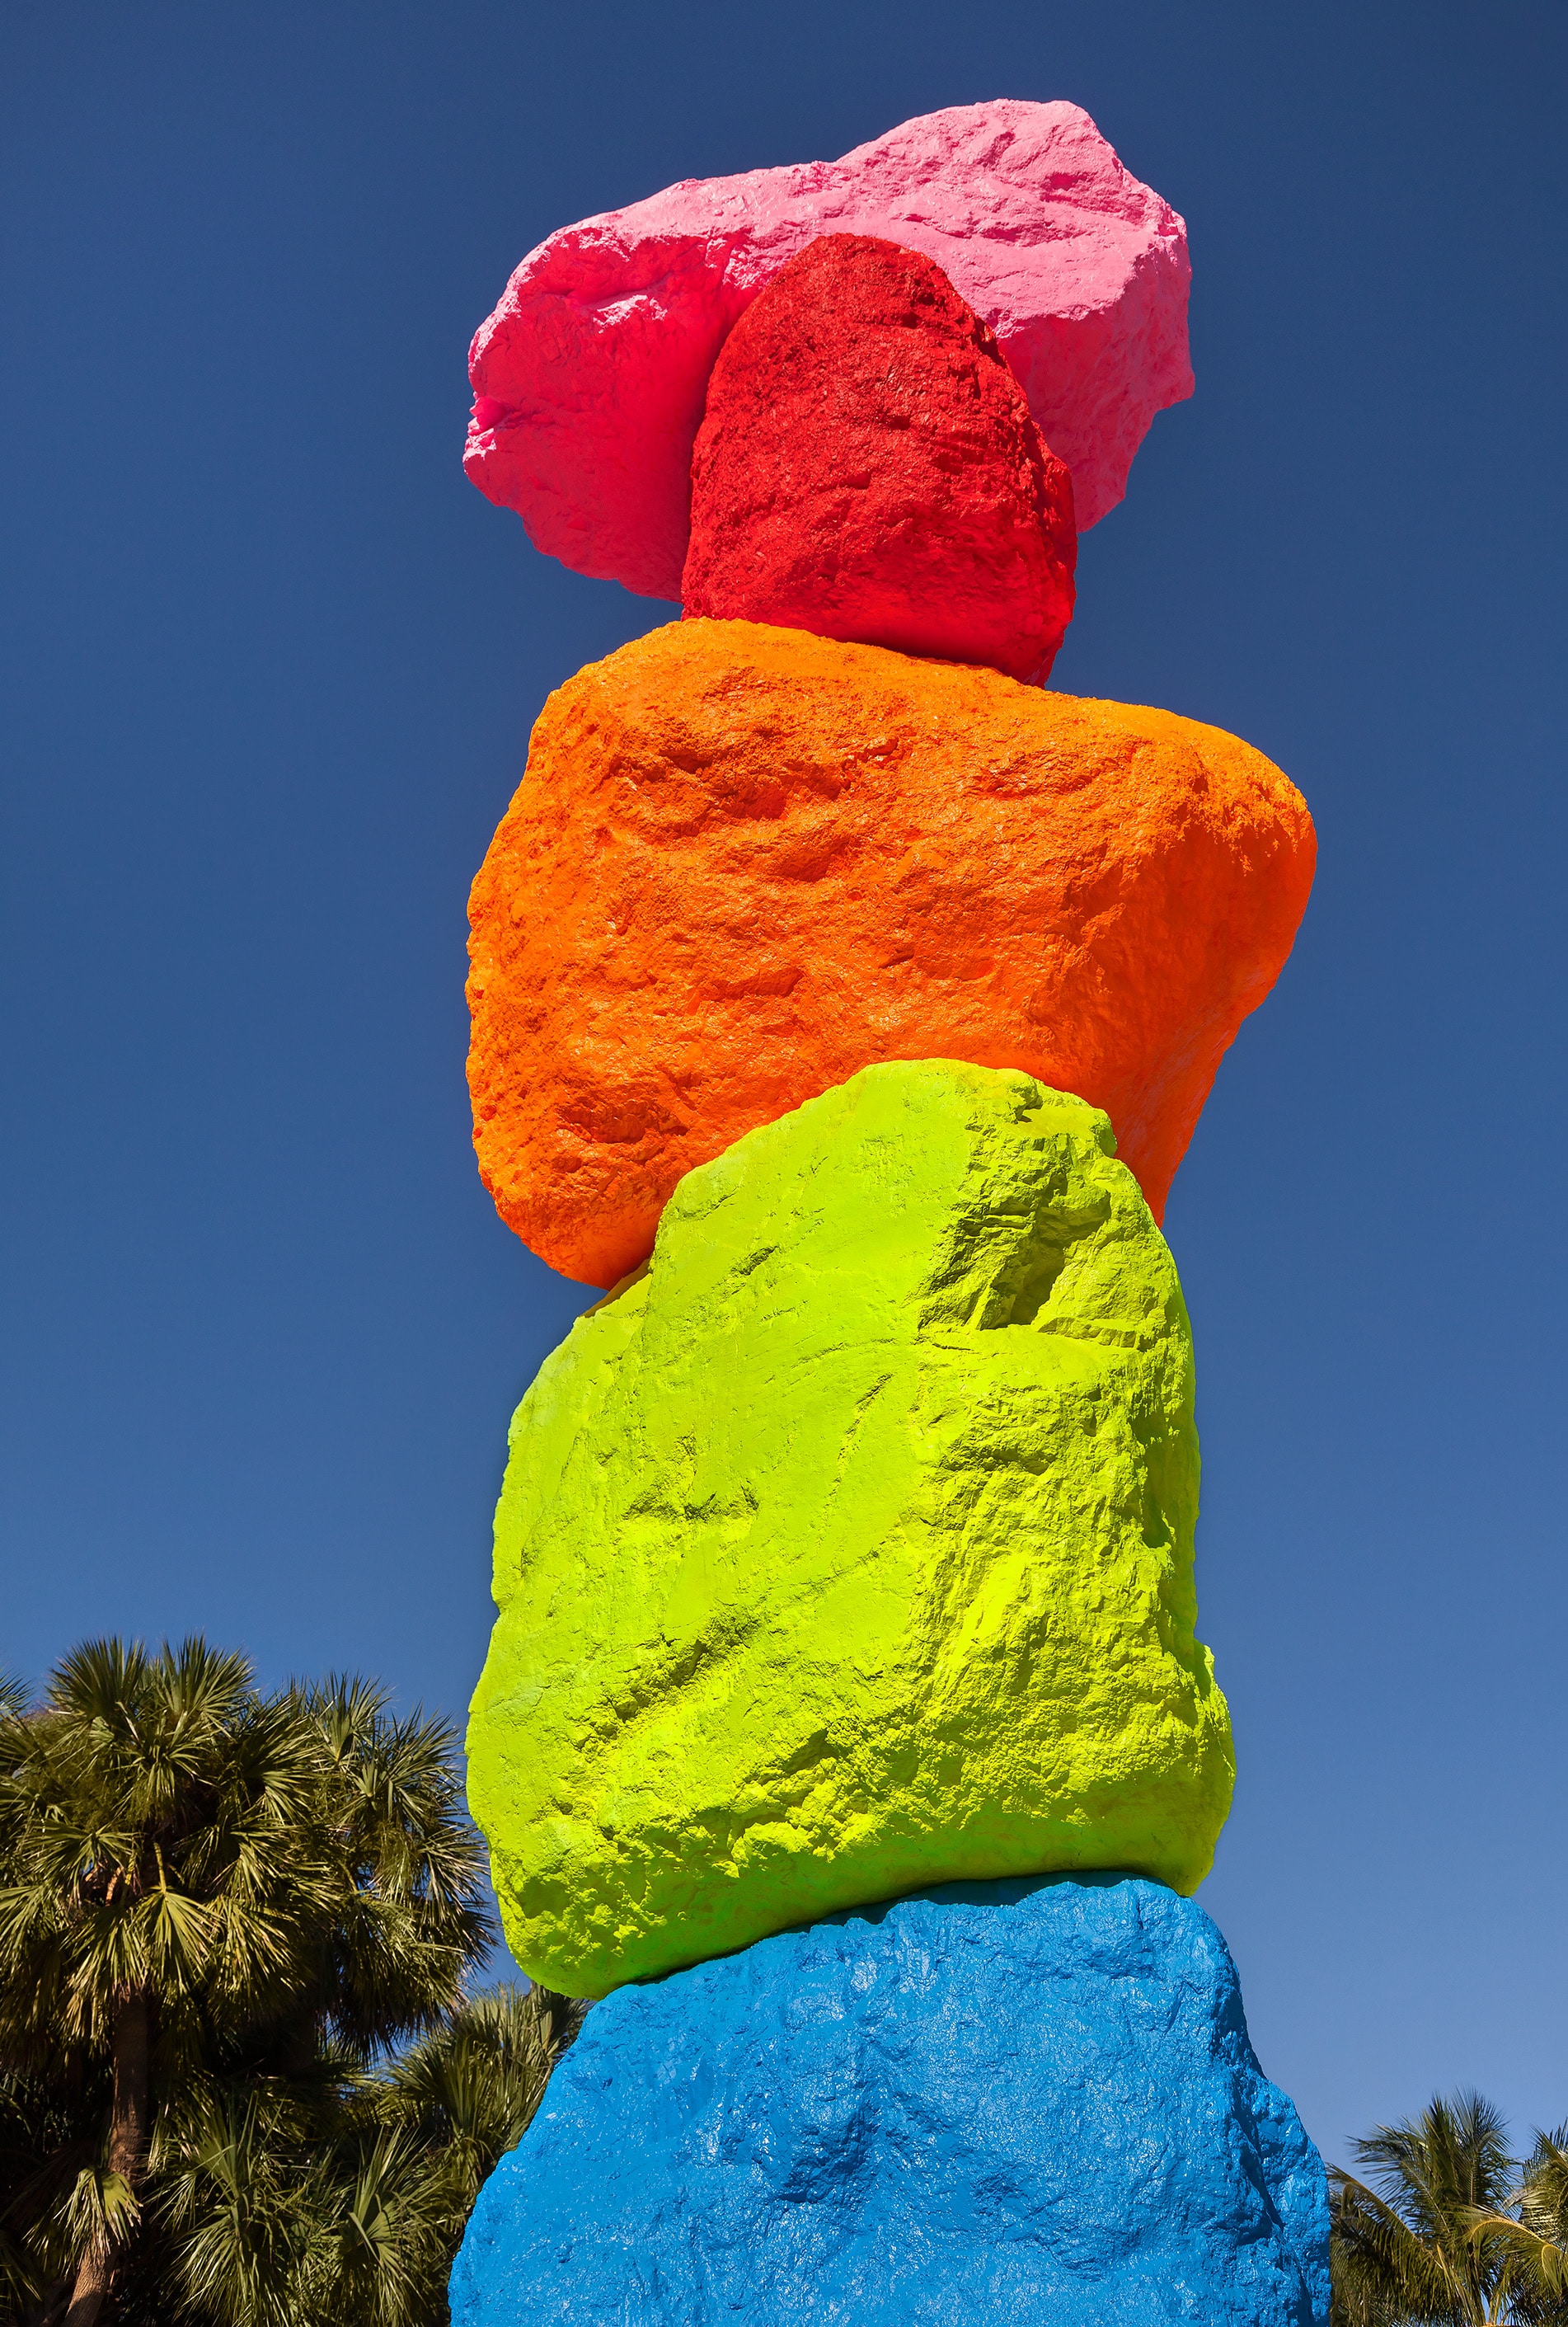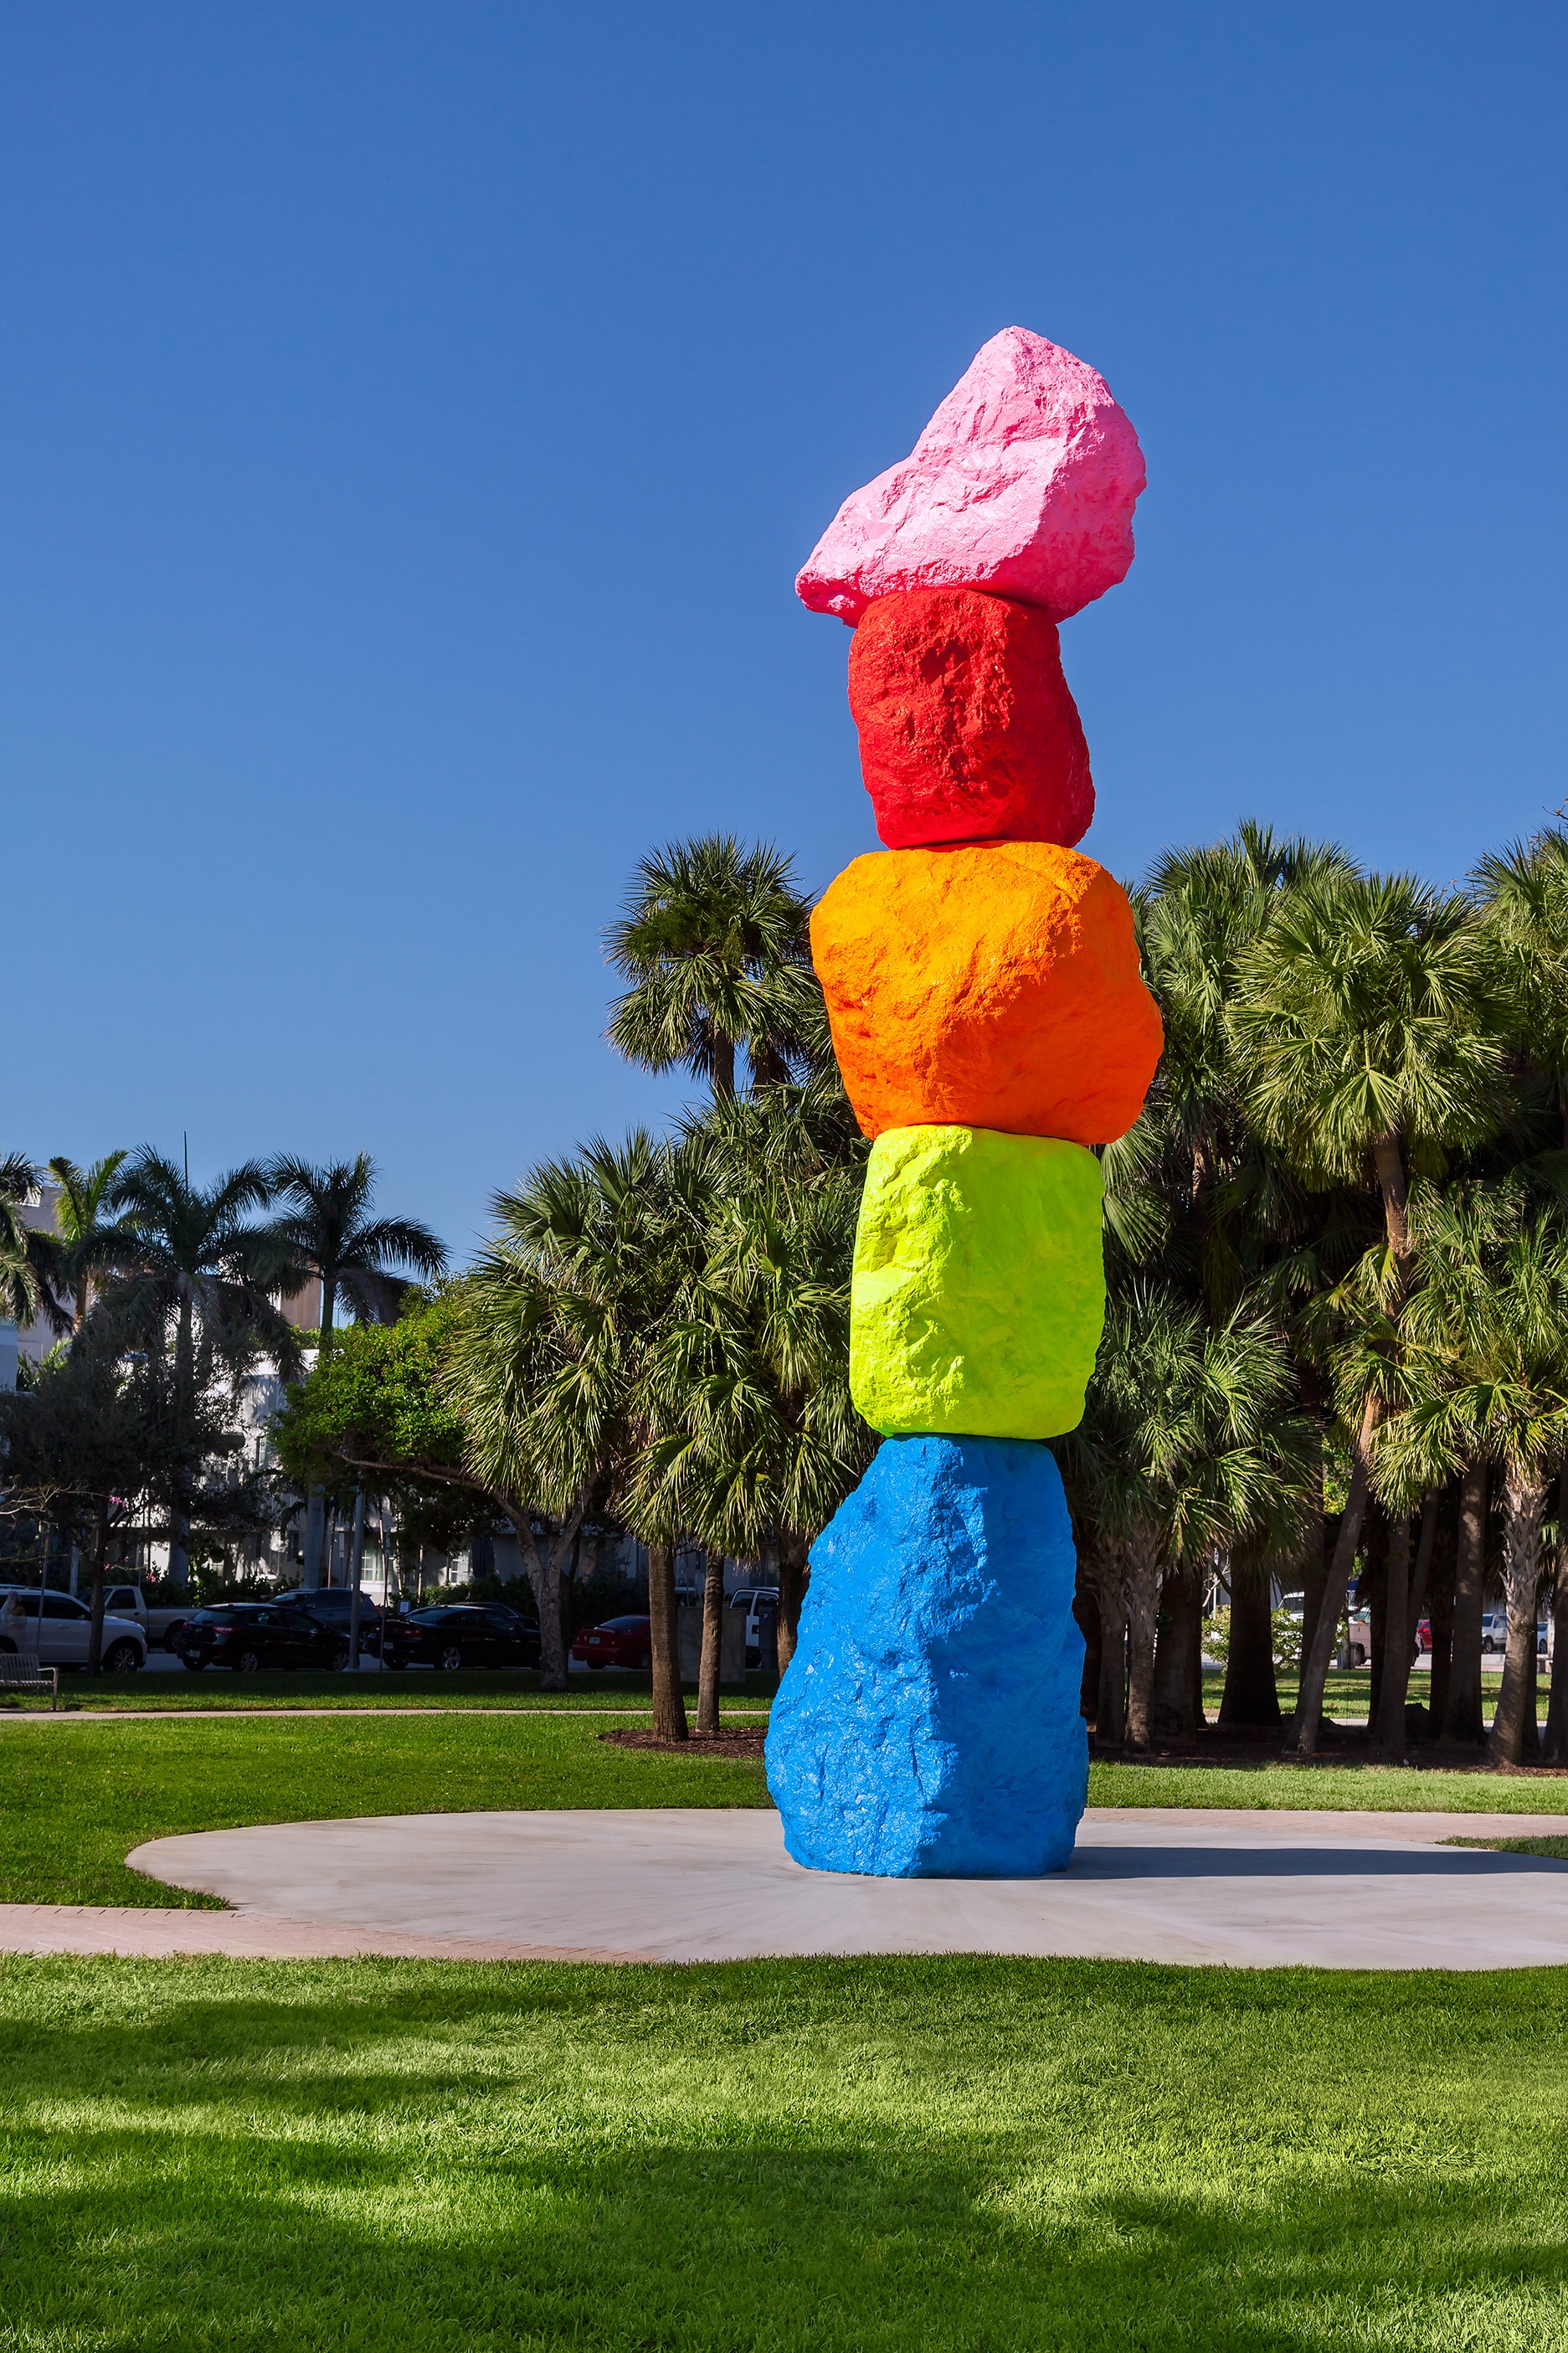
Miami Mountain Mini Sculptures
IDEAS DESIGN CHALLENGE
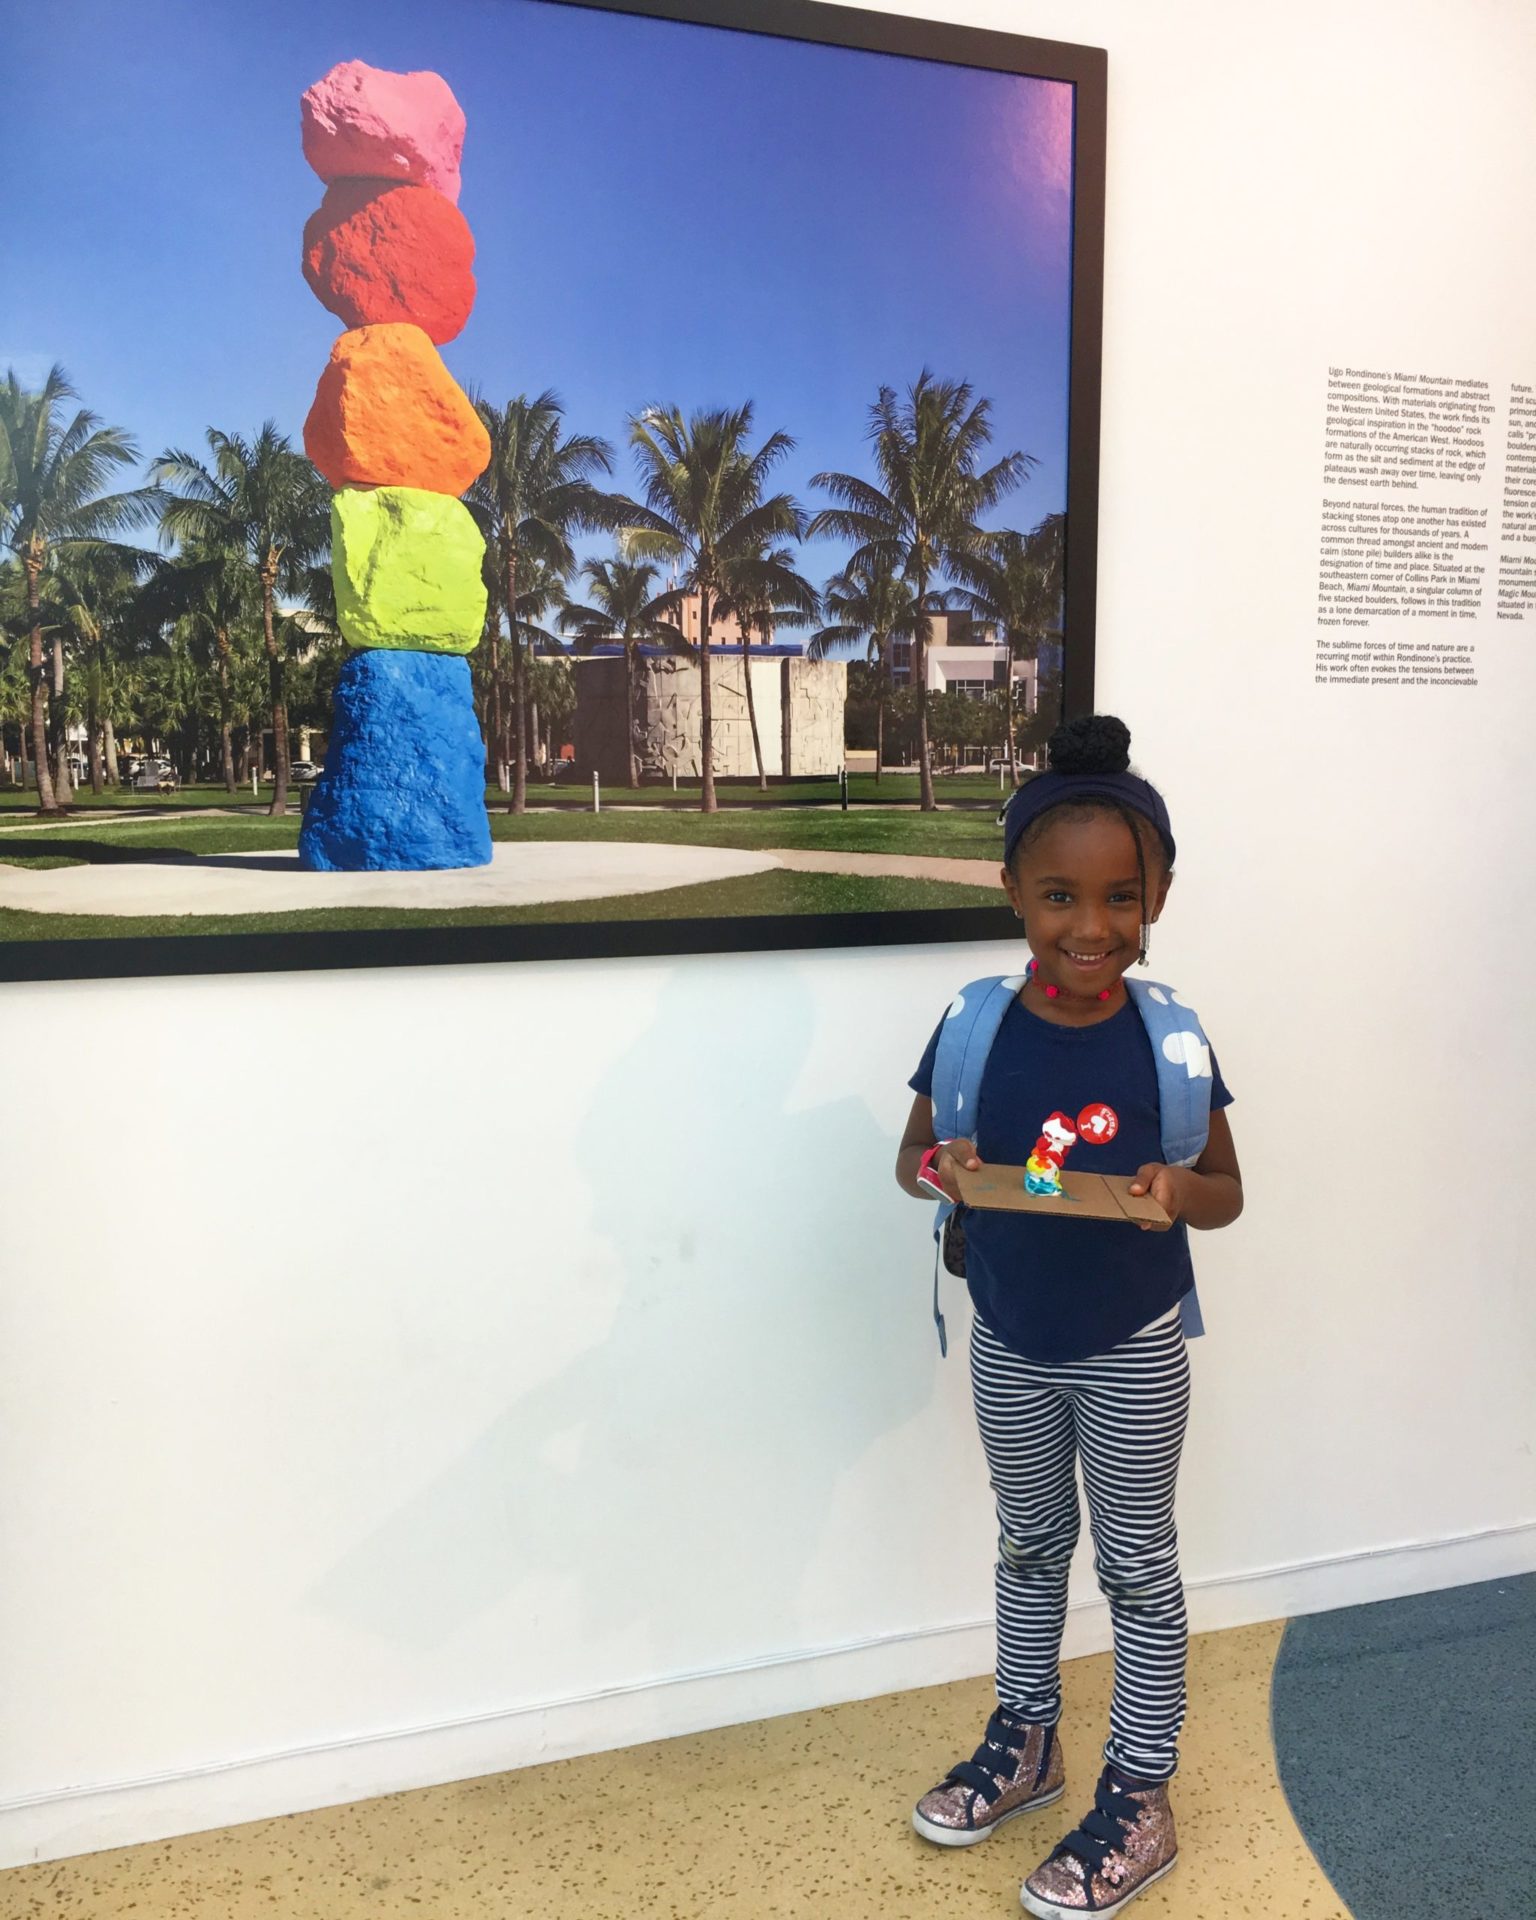
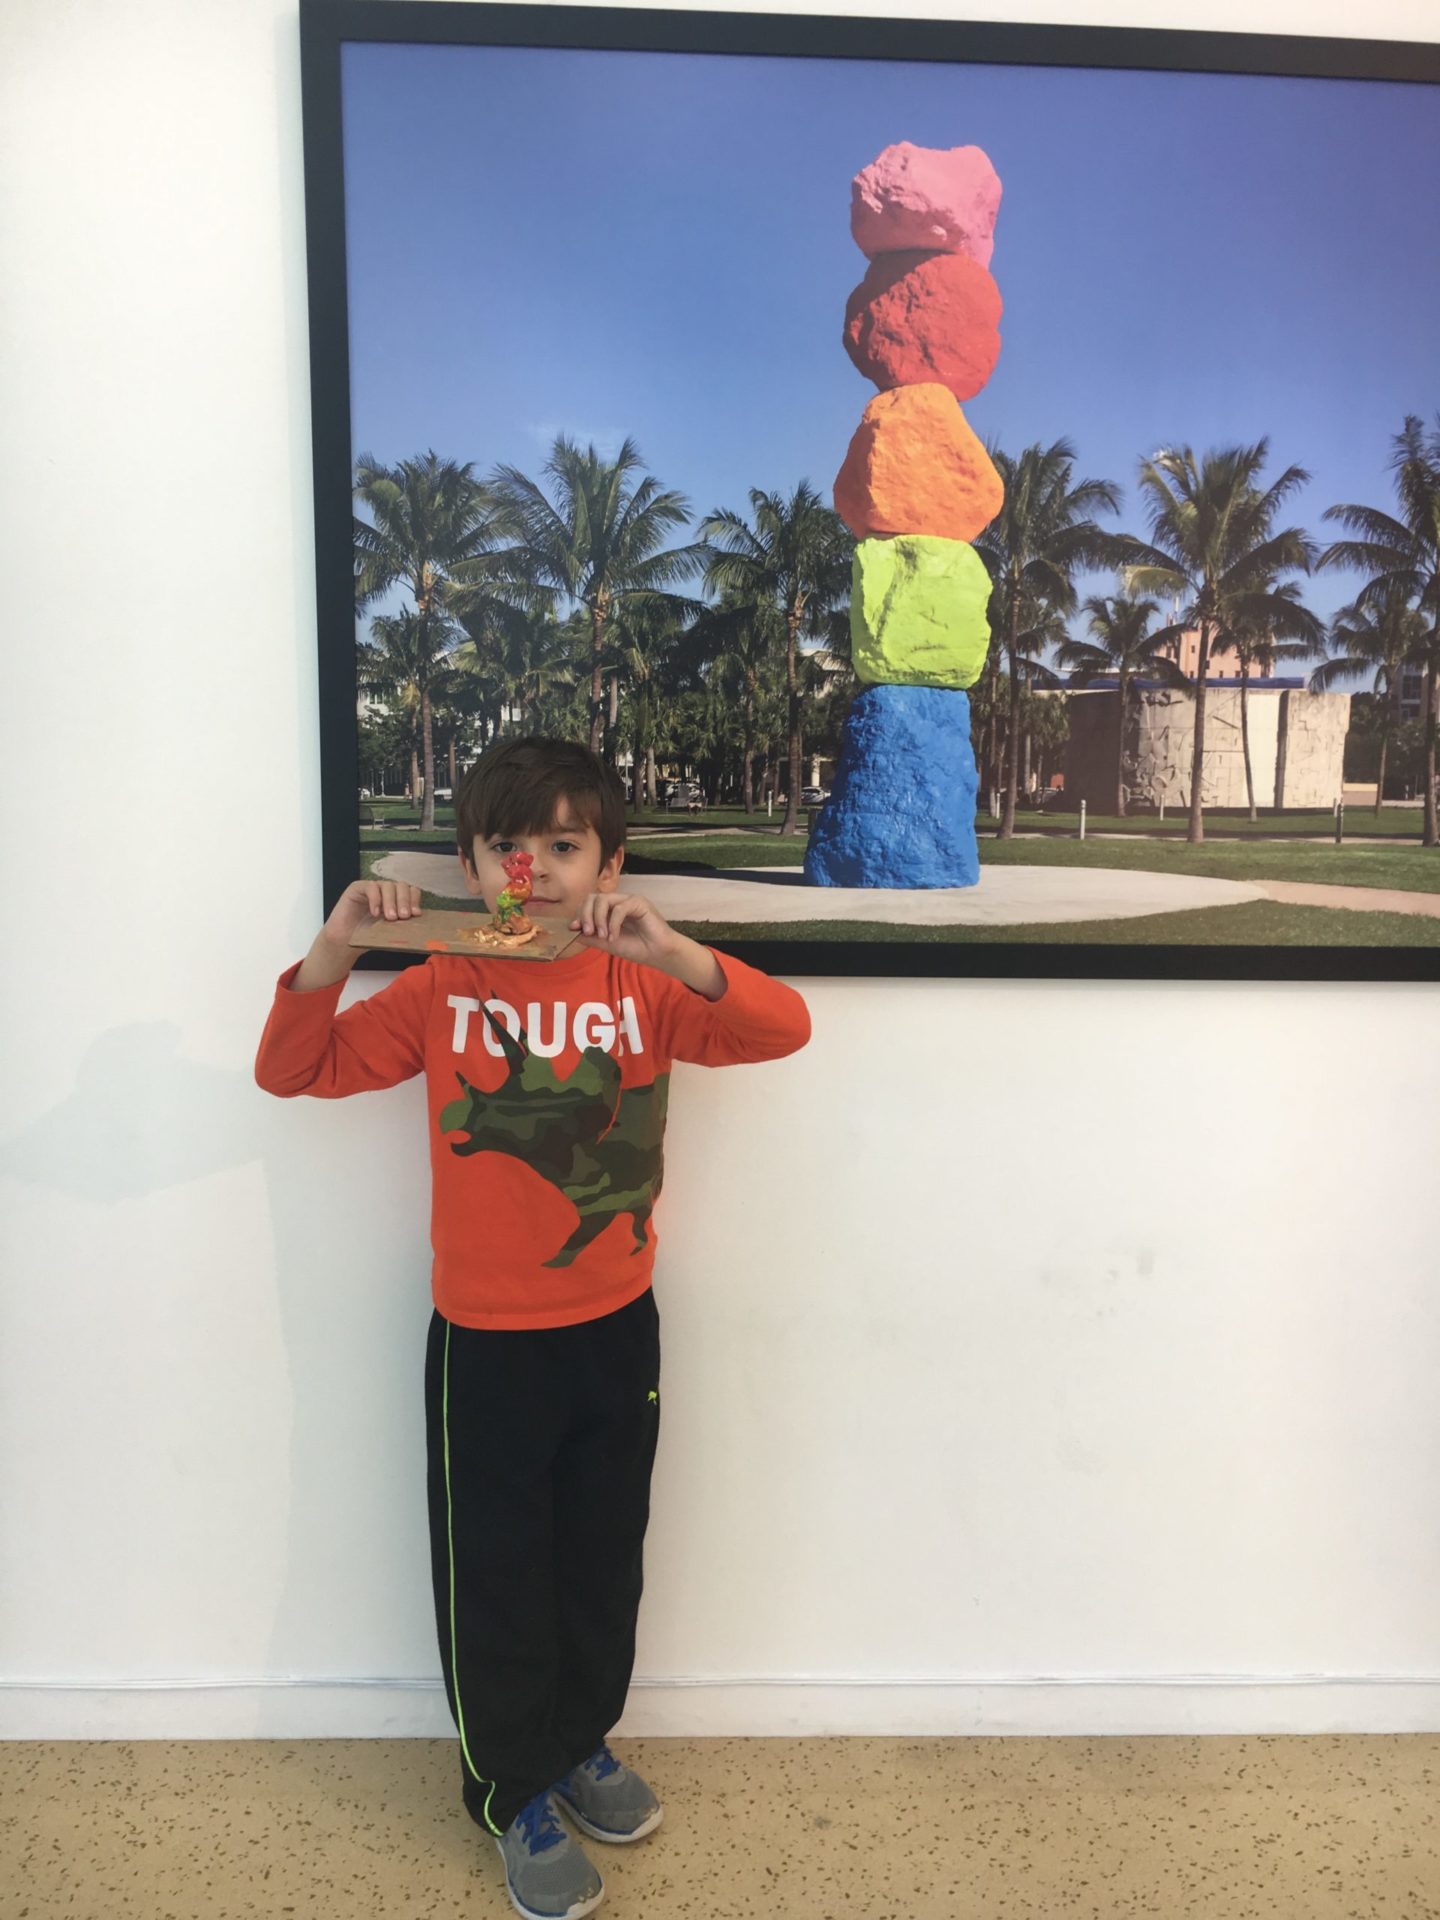
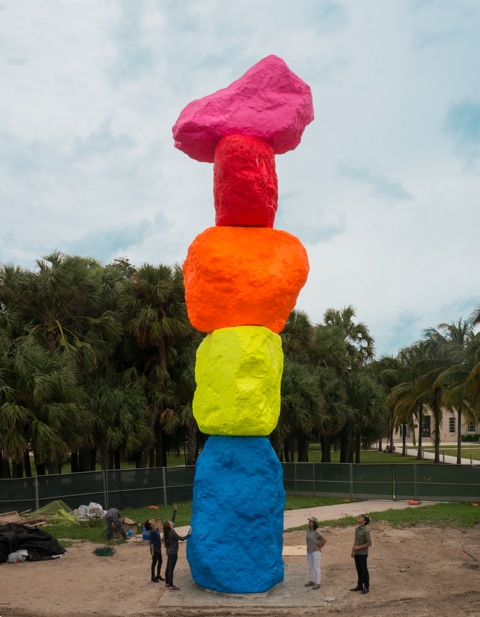
Inspired by Ugo Rondinone, Miami Mountain, 2016
* Tip: Read this whole lesson plan before you get started so you can see how the plan will evolve.
Lesson Duration: 45 minutes – 1 hour
MATERIALS
- Model Magic/Air Dry Clay* in five different colors
- Plastic table cloth or paper plate
- Coloring materials (markers, pencils or crayons work well for this activity)
- Paper or cardboard (cardstock recommended)
- Optional: popsicle sticks, toothpicks, skewers, forks, spoons and other tools found around the house to create different textures with your sculpture.
*For those with limited resources you can make your own clay using simple household materials. Follow the instructions HERE, or watch the video below to guide you)
Vocabulary:
Base: The base is what the sculpture is attached, fixed or mounted on. Pedestals or blocks are the most commonly used base for sculptures.
Texture: The actual or the illusion of tactile value on the surface of an area as created by nature or by an artist through a manipulation of the visual elements.
BEFORE YOU BEGIN
Watch the following videos about Ugo Rondinone’s Miami Mountain and how the work was made.
DIRECTIONS
Prep
Clear a flat surface and place your paper plate or plastic table cloth to ensure your clay does not stain. Then place your clay aside, be sure it’s well stored so it does not dry while you design your base.
STEP 1
Design the base for your sculpture. Using your colors and a piece of paper or cardboard begin to design a location where you’ll be placing your Miami Mountain sculpture. Think of the plant life, animals and materials that can be found in this location. Then draw them onto your base.
STEP 2
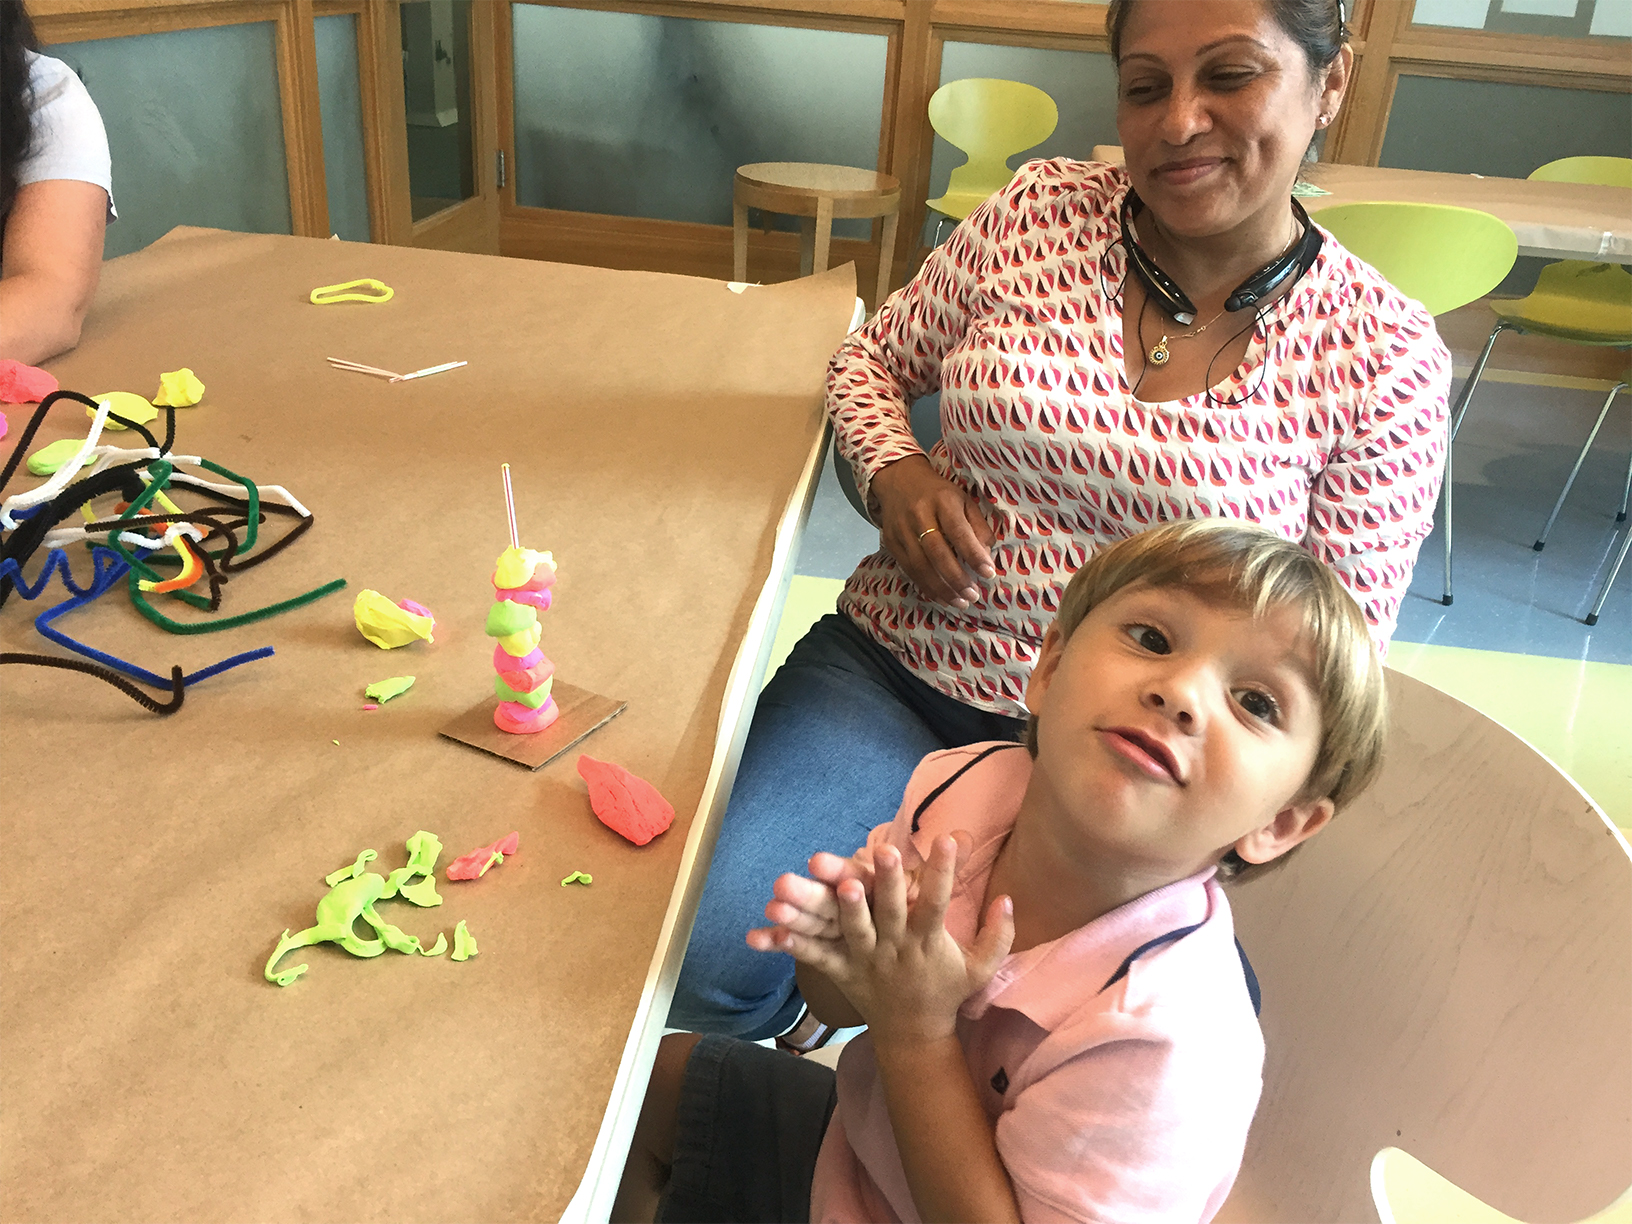
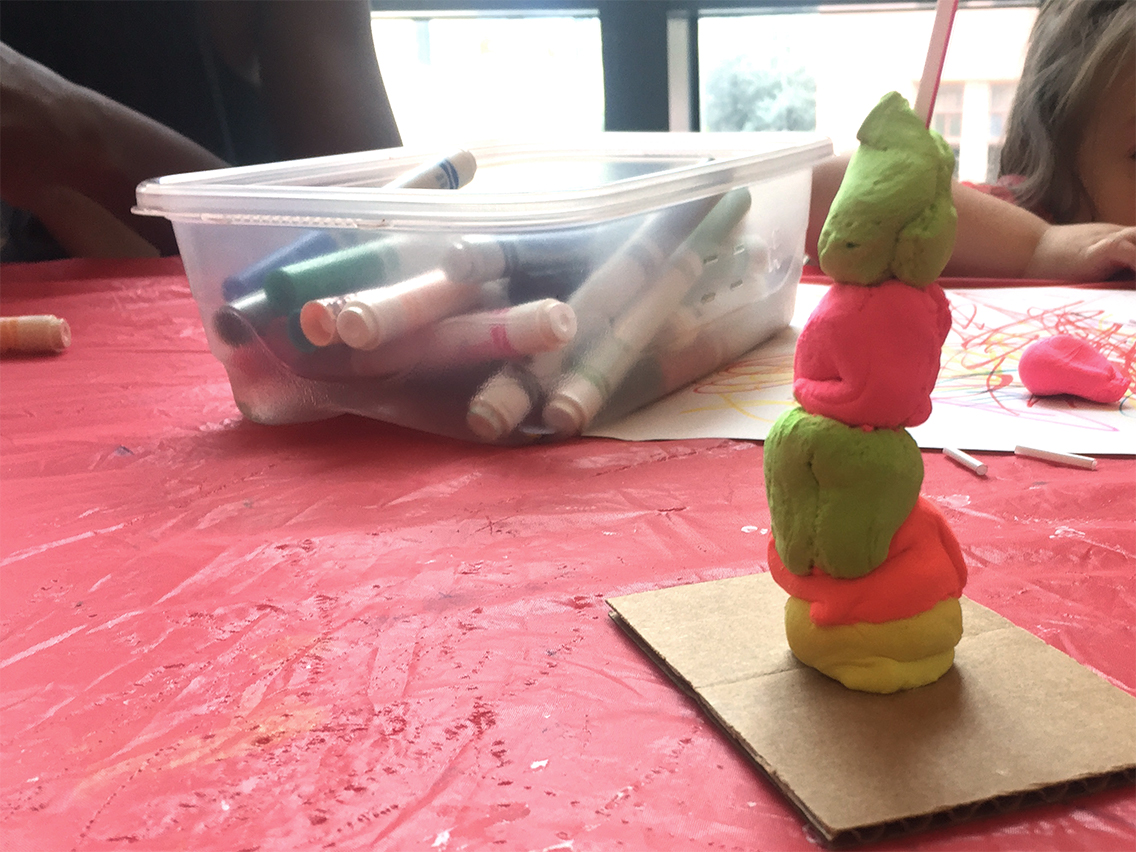
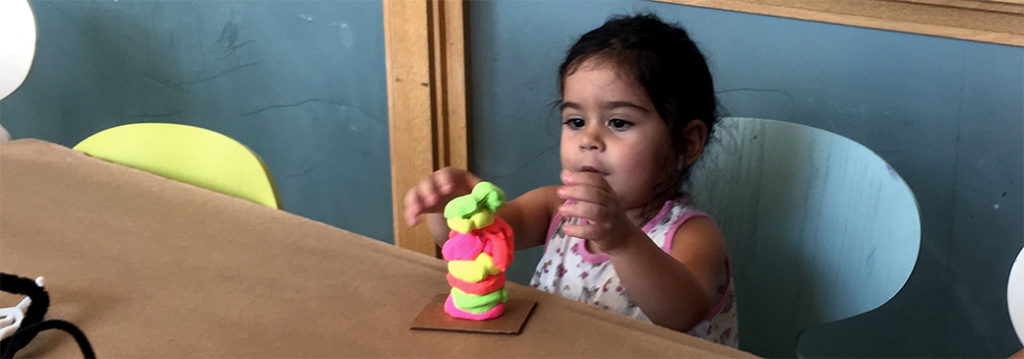
Set aside your base and begin creating your sculpture. Pinch, flatten, roll your clay to create fun shapes.
Tip: Clay works best when warm, be sure to warm up the clay by rolling it in the palm of your hands.
STEP 3
Join the shapes you created by gently pressing the clay together, stacking one on top of the other. Don’t forget to balance them out to ensure they don’t fall over.
STEP 4
Place your creation on the base you created.
You did it! Use a black pen or pencil to sign your name, and add date and title of your piece on the bottom right corner of the base. Be sure to share your work by taking a picture of your sculpture and tagging @BassCreativityCenter and #BassCreativityCenter.
LEARNING BENEFITS
Clay is one of the most effective art mediums for children to discover and develop their creative and learning skills. When working with clay children use fine motor skills and support sensory development, self esteem, self expression and problem solving. In addition, clay has a well documented therapeutic quality that settles and calms children.
ADAPTATION FOR YOUNGER ARTISTS
Younger artists may need help rolling and creating their sculpture. Assist them by providing images of different shapes to create, and tools to help mold.
ADAPTATION FOR OLDER ARTISTS
Using tools found at home (popsicle sticks, toothpicks, skewers, forks, spoons, etc.) try to create a more detailed sculpture. If you have leftover clay create other sculptures to surround your main piece. Add animals, people and other details to surround your piece.
ADDITIONAL RESOURCES
- Learn more about Ugo Rondinone’s Miami Mountain
- Take a virtual tour of Ugo Rondinone’s exhibition at The Bass, good evening beautiful blue
- Learn more about Ugo Rondinone’s exhibition at The Bass, good evening beautiful blue
- Complete more activities like this inspired by Miami Mountain
- Visit Ugo Rondinone’s website
STEAM CHALLENGE
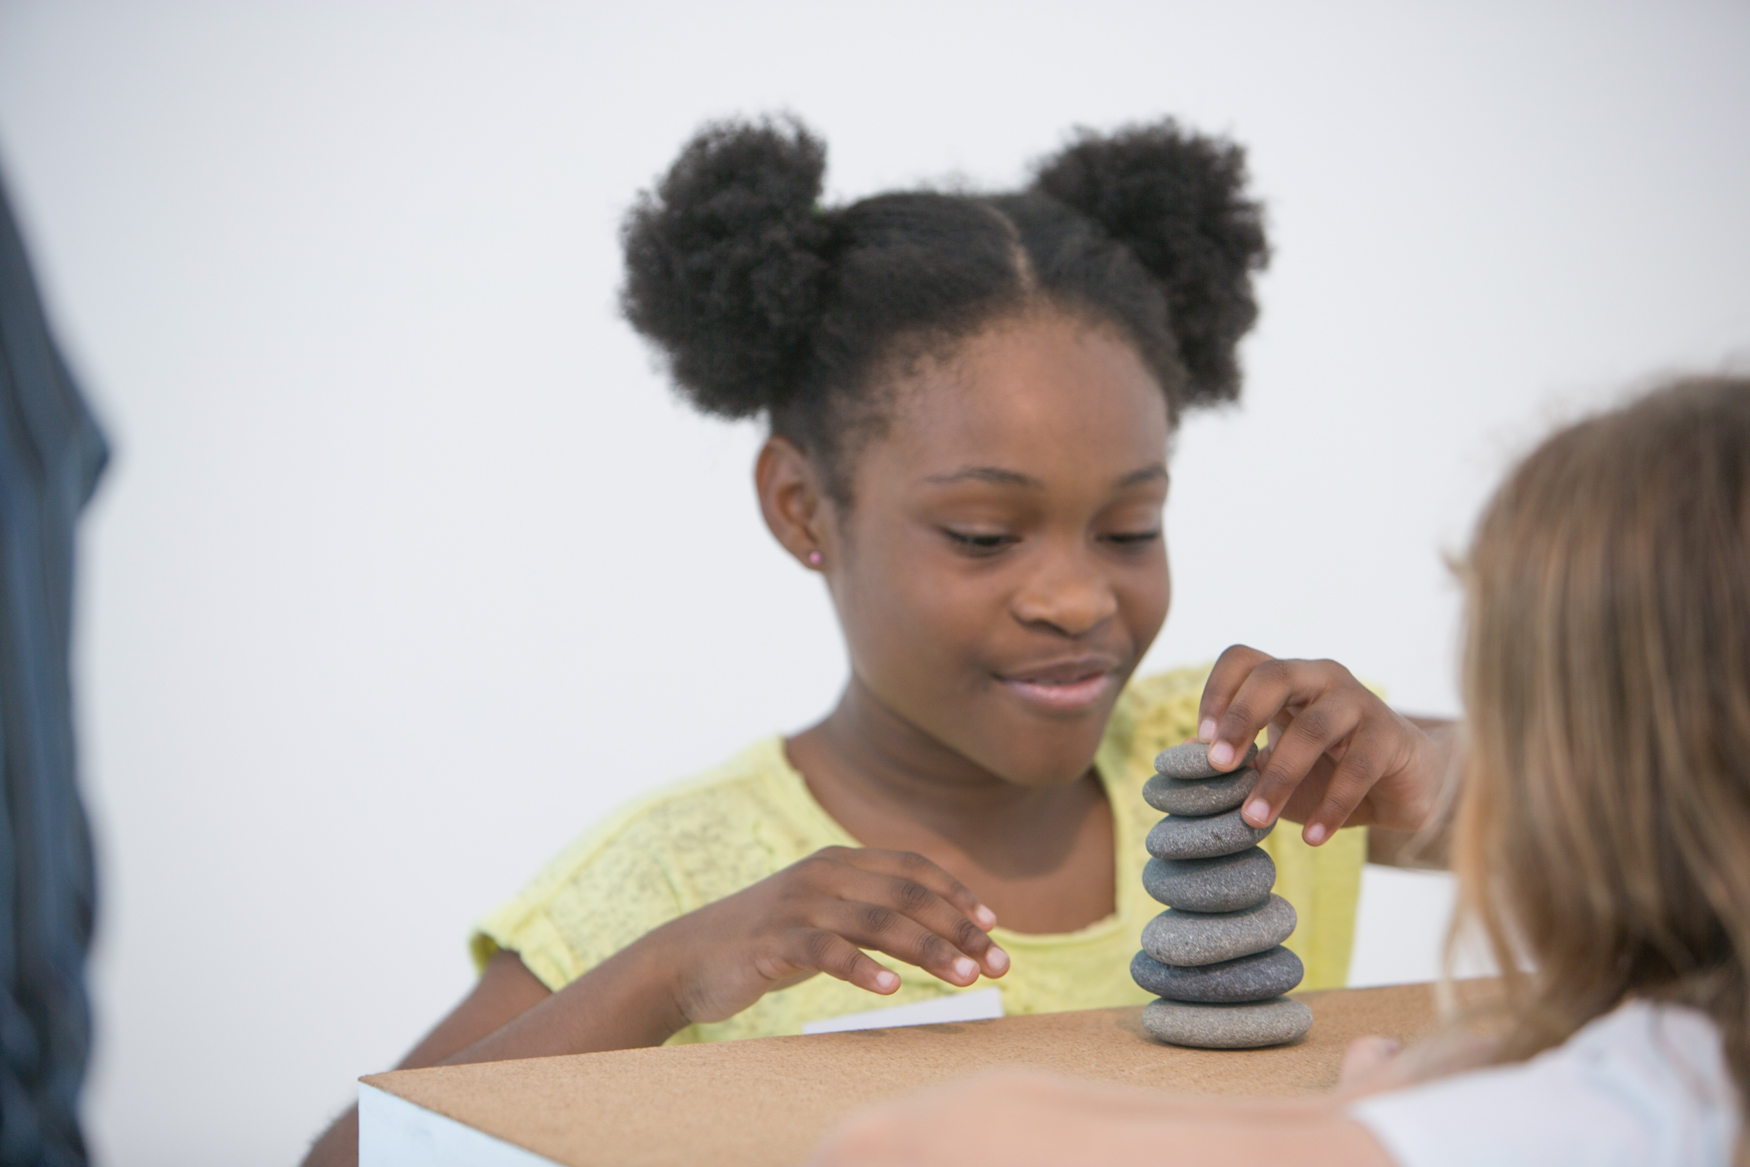
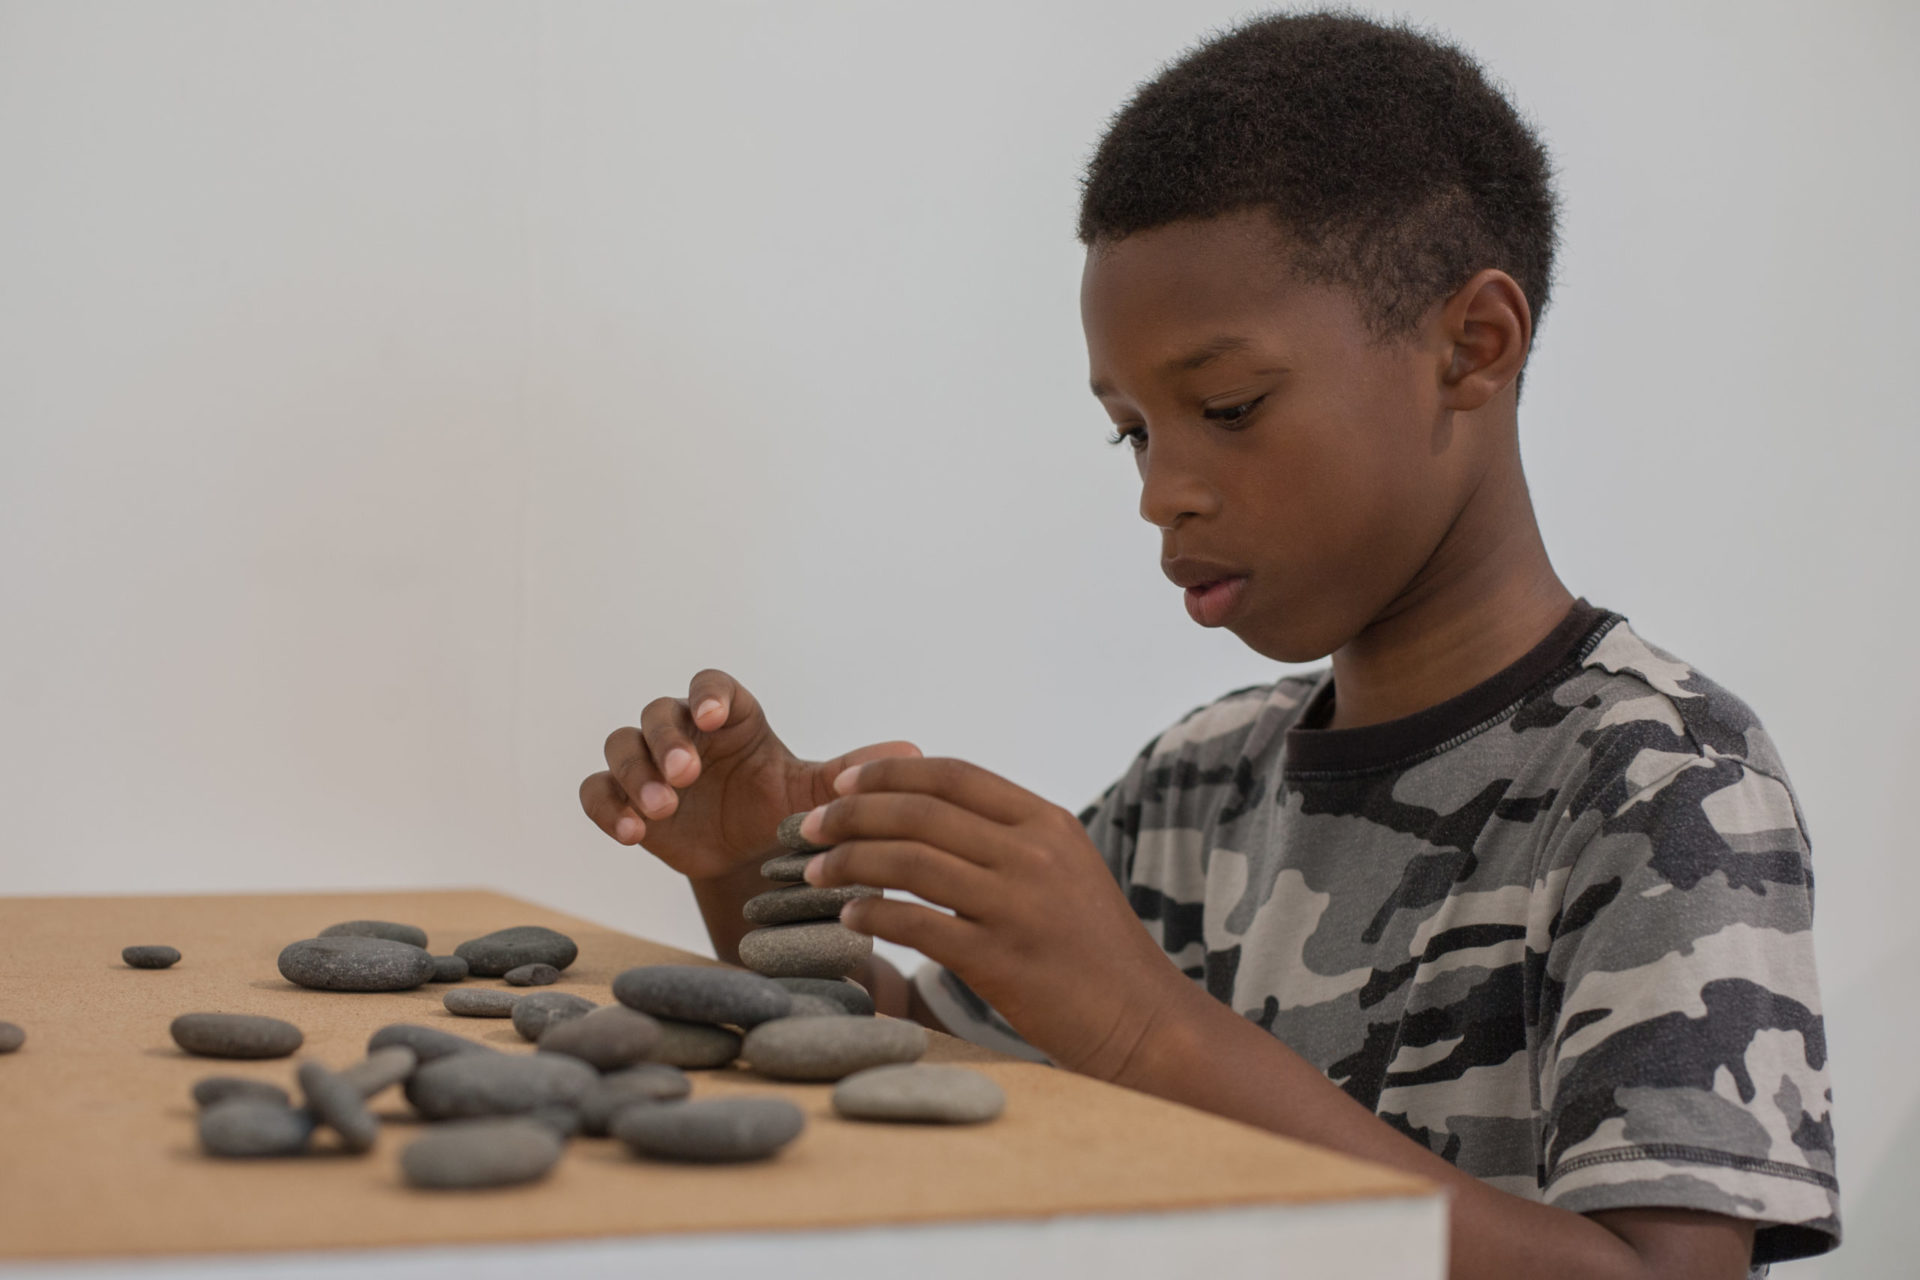
Find five different colorful objects that match the colors of Ugo Rondinone’s Miami Mountain sculpture (pink, red, orange, green and blue). Try and stack these items on top of each other to make your very own sculpture. How tall were you able to make your sculpture? Can you make it any larger by swapping out the items? What kind of tools should you use to measure this sculpture? Send us a picture of you standing next to your sculpture with the measurements of how tall you were able to make your Miami Mountain sculpture. Let’s see who is able to build the largest Miami Mountain at home!
Be sure to share your artwork by taking a picture of your sculpture and tagging @BassCreativityCenter and #BassCreativityCenter.